Weed Applications
Overview
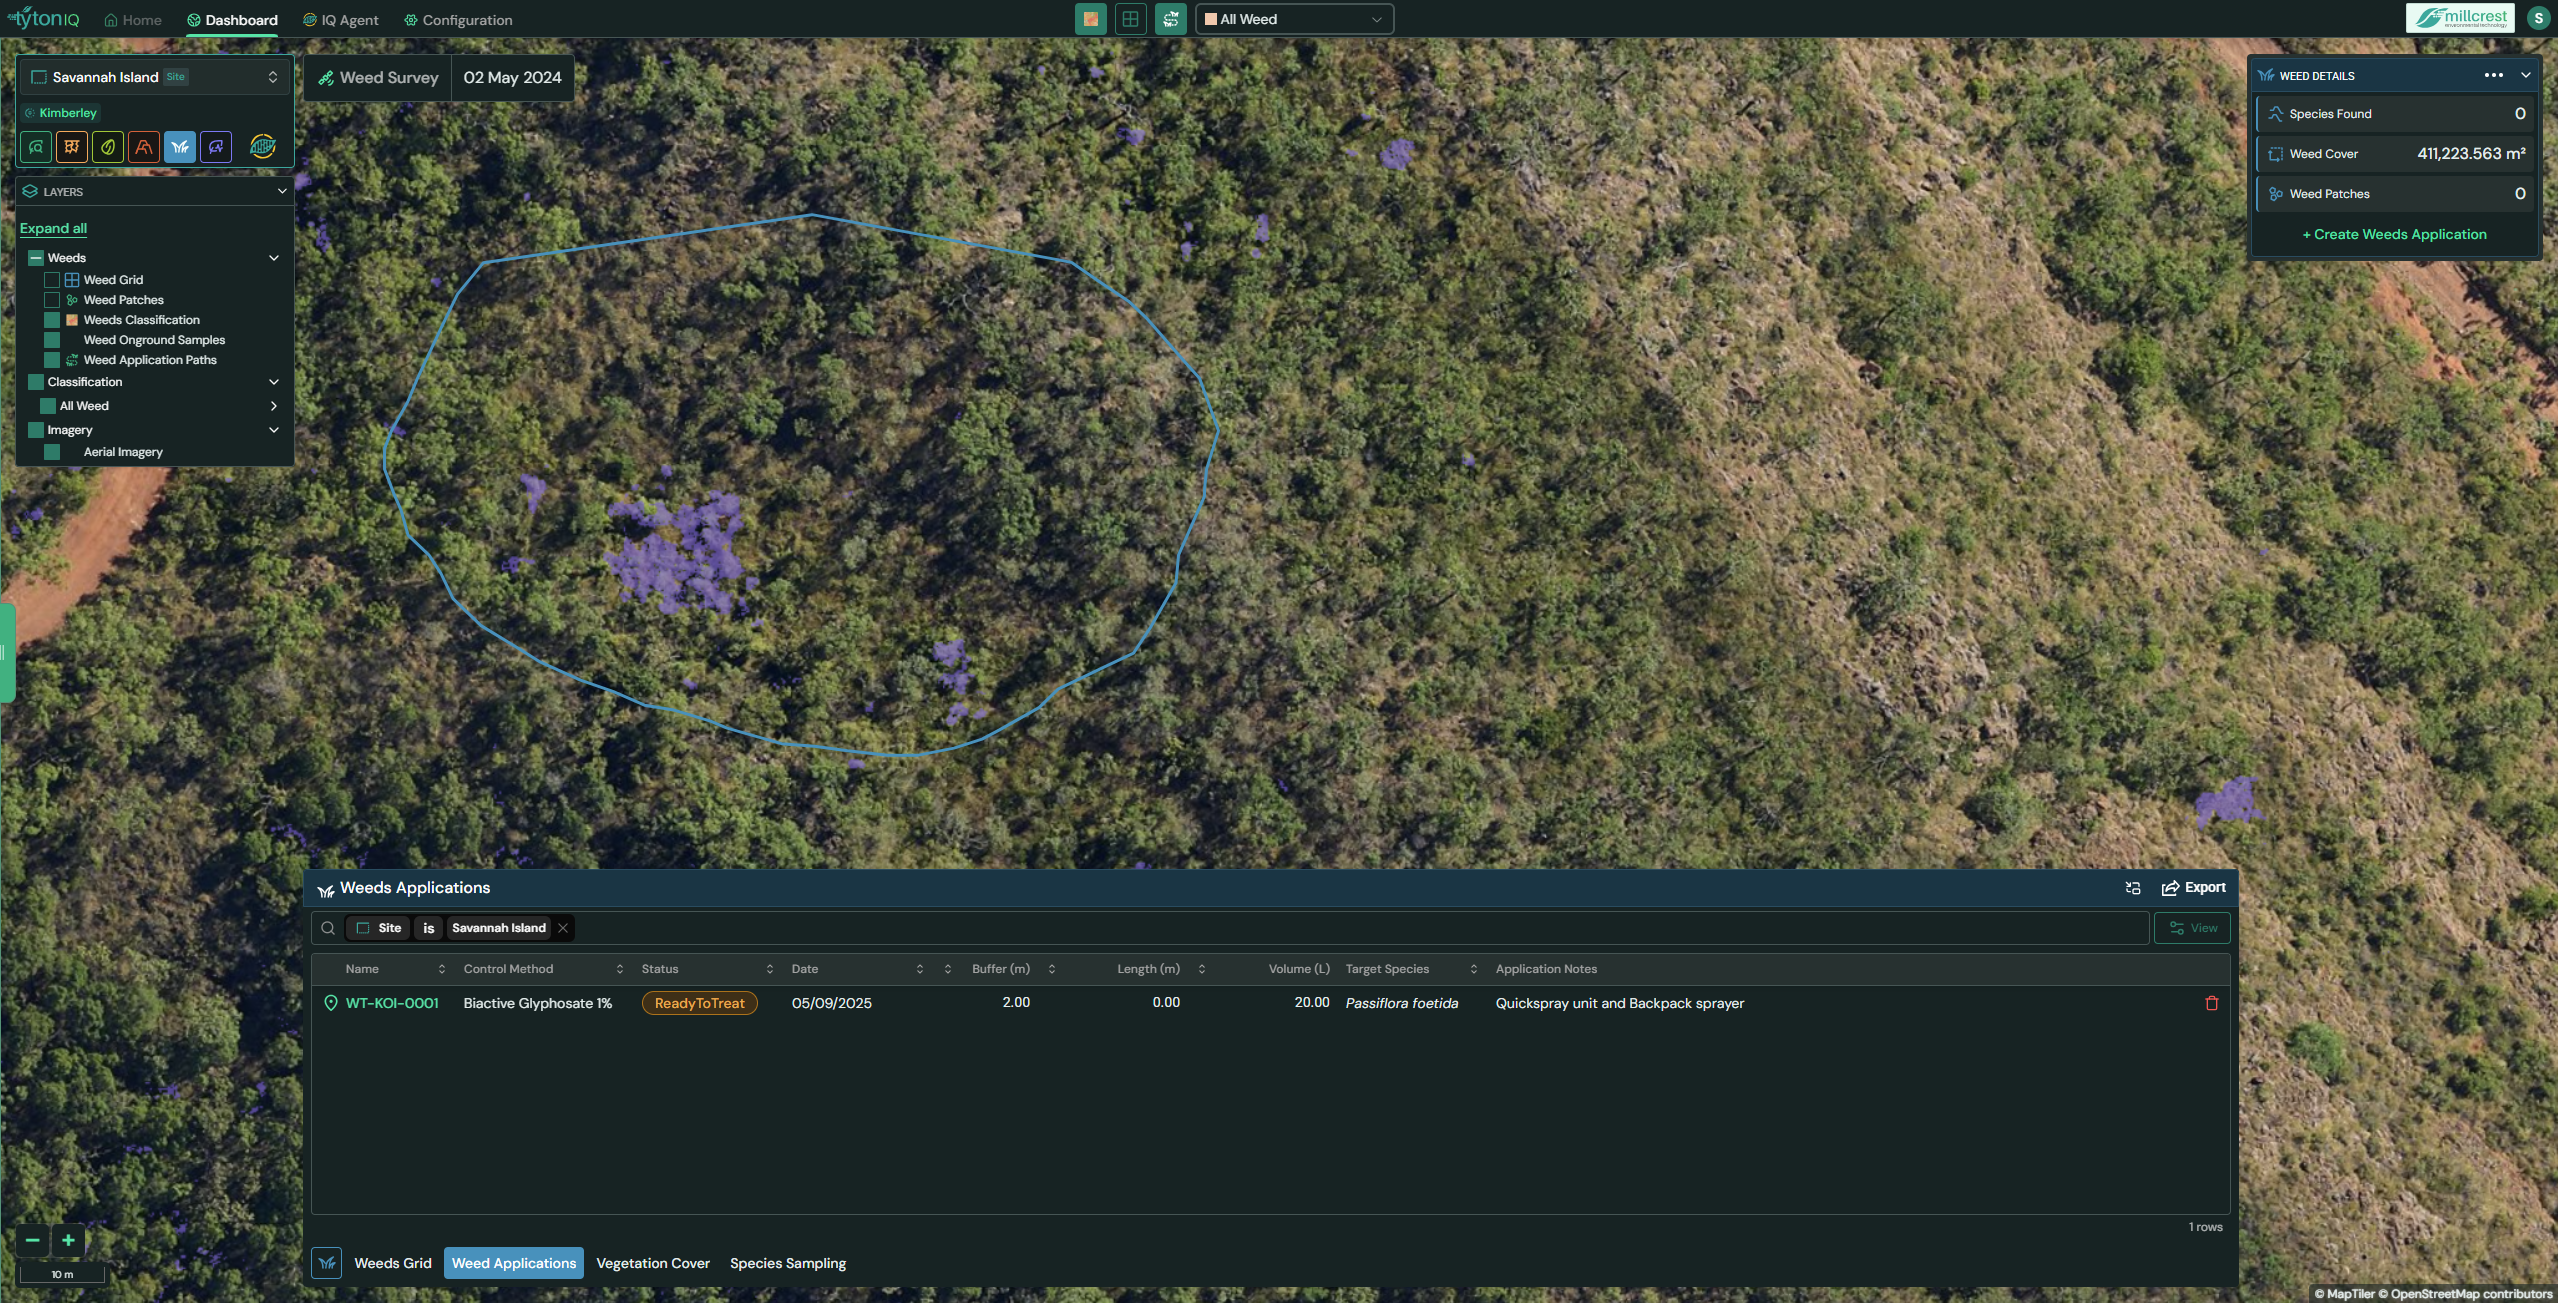
Weed Applications capture planned or completed treatment activities and display them both on the map and in the bottom drawer. Applications can include a treatment path (polygon or line) uploaded as a zipped shapefile, along with key operational details such as control method, date, target species, volume, buffer, weather conditions, and notes. Once created, applications are visible as blue paths/polygons on the imagery and as rows in the Weed Applications table.
⚠️Note: The Create Weeds Application button in the top-right card is available only when the Weeds Grid layer is hidden.
Create a weed application
1. Hide the Weeds Grid
- Toggle the Grid overlay off (toolbar or Layers panel).
- Verify the Create Weeds Application button appears in the top-right card.
2. Open the creator
- Click Create Weeds Application (top-right card).
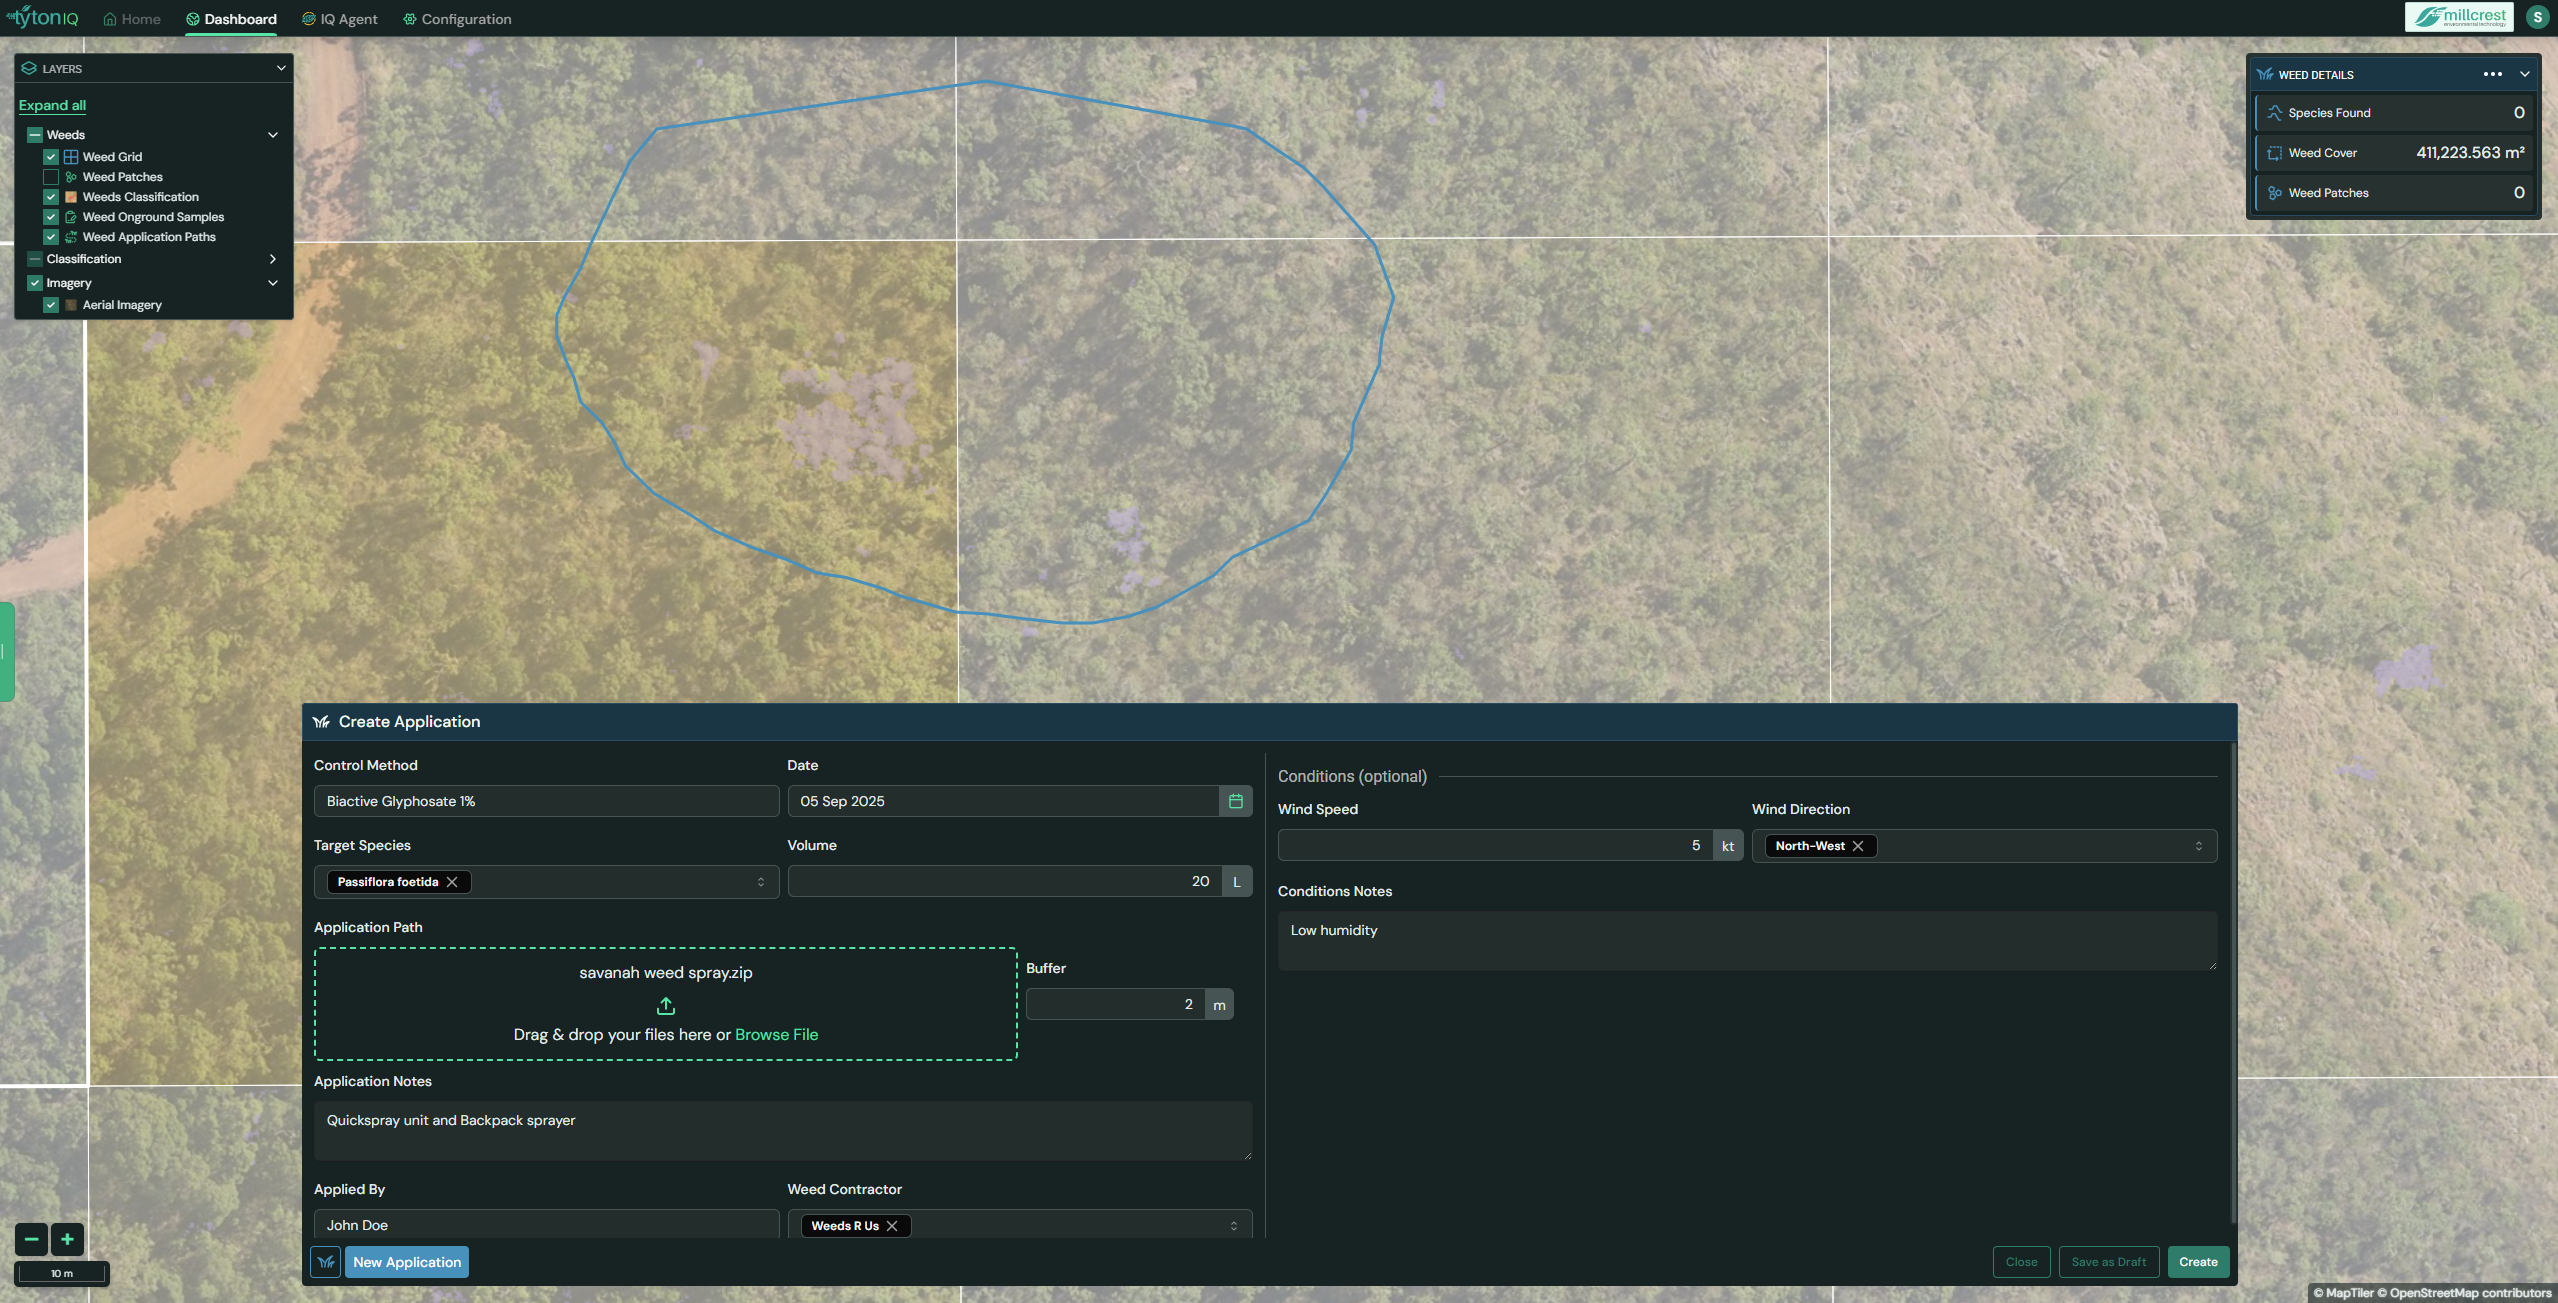
3. Enter application details
- Control Method – e.g., BiActive Glyphosate 1%.
- Date – treatment date.
- Target Species – e.g., Passiflora foetida.
- Volume (L) – planned or used volume.
- Buffer (m) – optional offset applied to the uploaded path.
- Application Notes – free-text operational notes (e.g., equipment, safety, access).
- Conditions (optional) – wind speed/direction, humidity, etc.
4. Upload the application path
- Supported geometry: polygon or line.
- Upload a .zip containing a shapefile with the following mandatory parts:
.shp   geometry
.shx   shape index
.dbf   attributes
.prj   projection
.cpg character encoding - Drag & drop the ZIP into Application Path, or click Browse File.
5. Save
- Click Create to save the application.
After creation
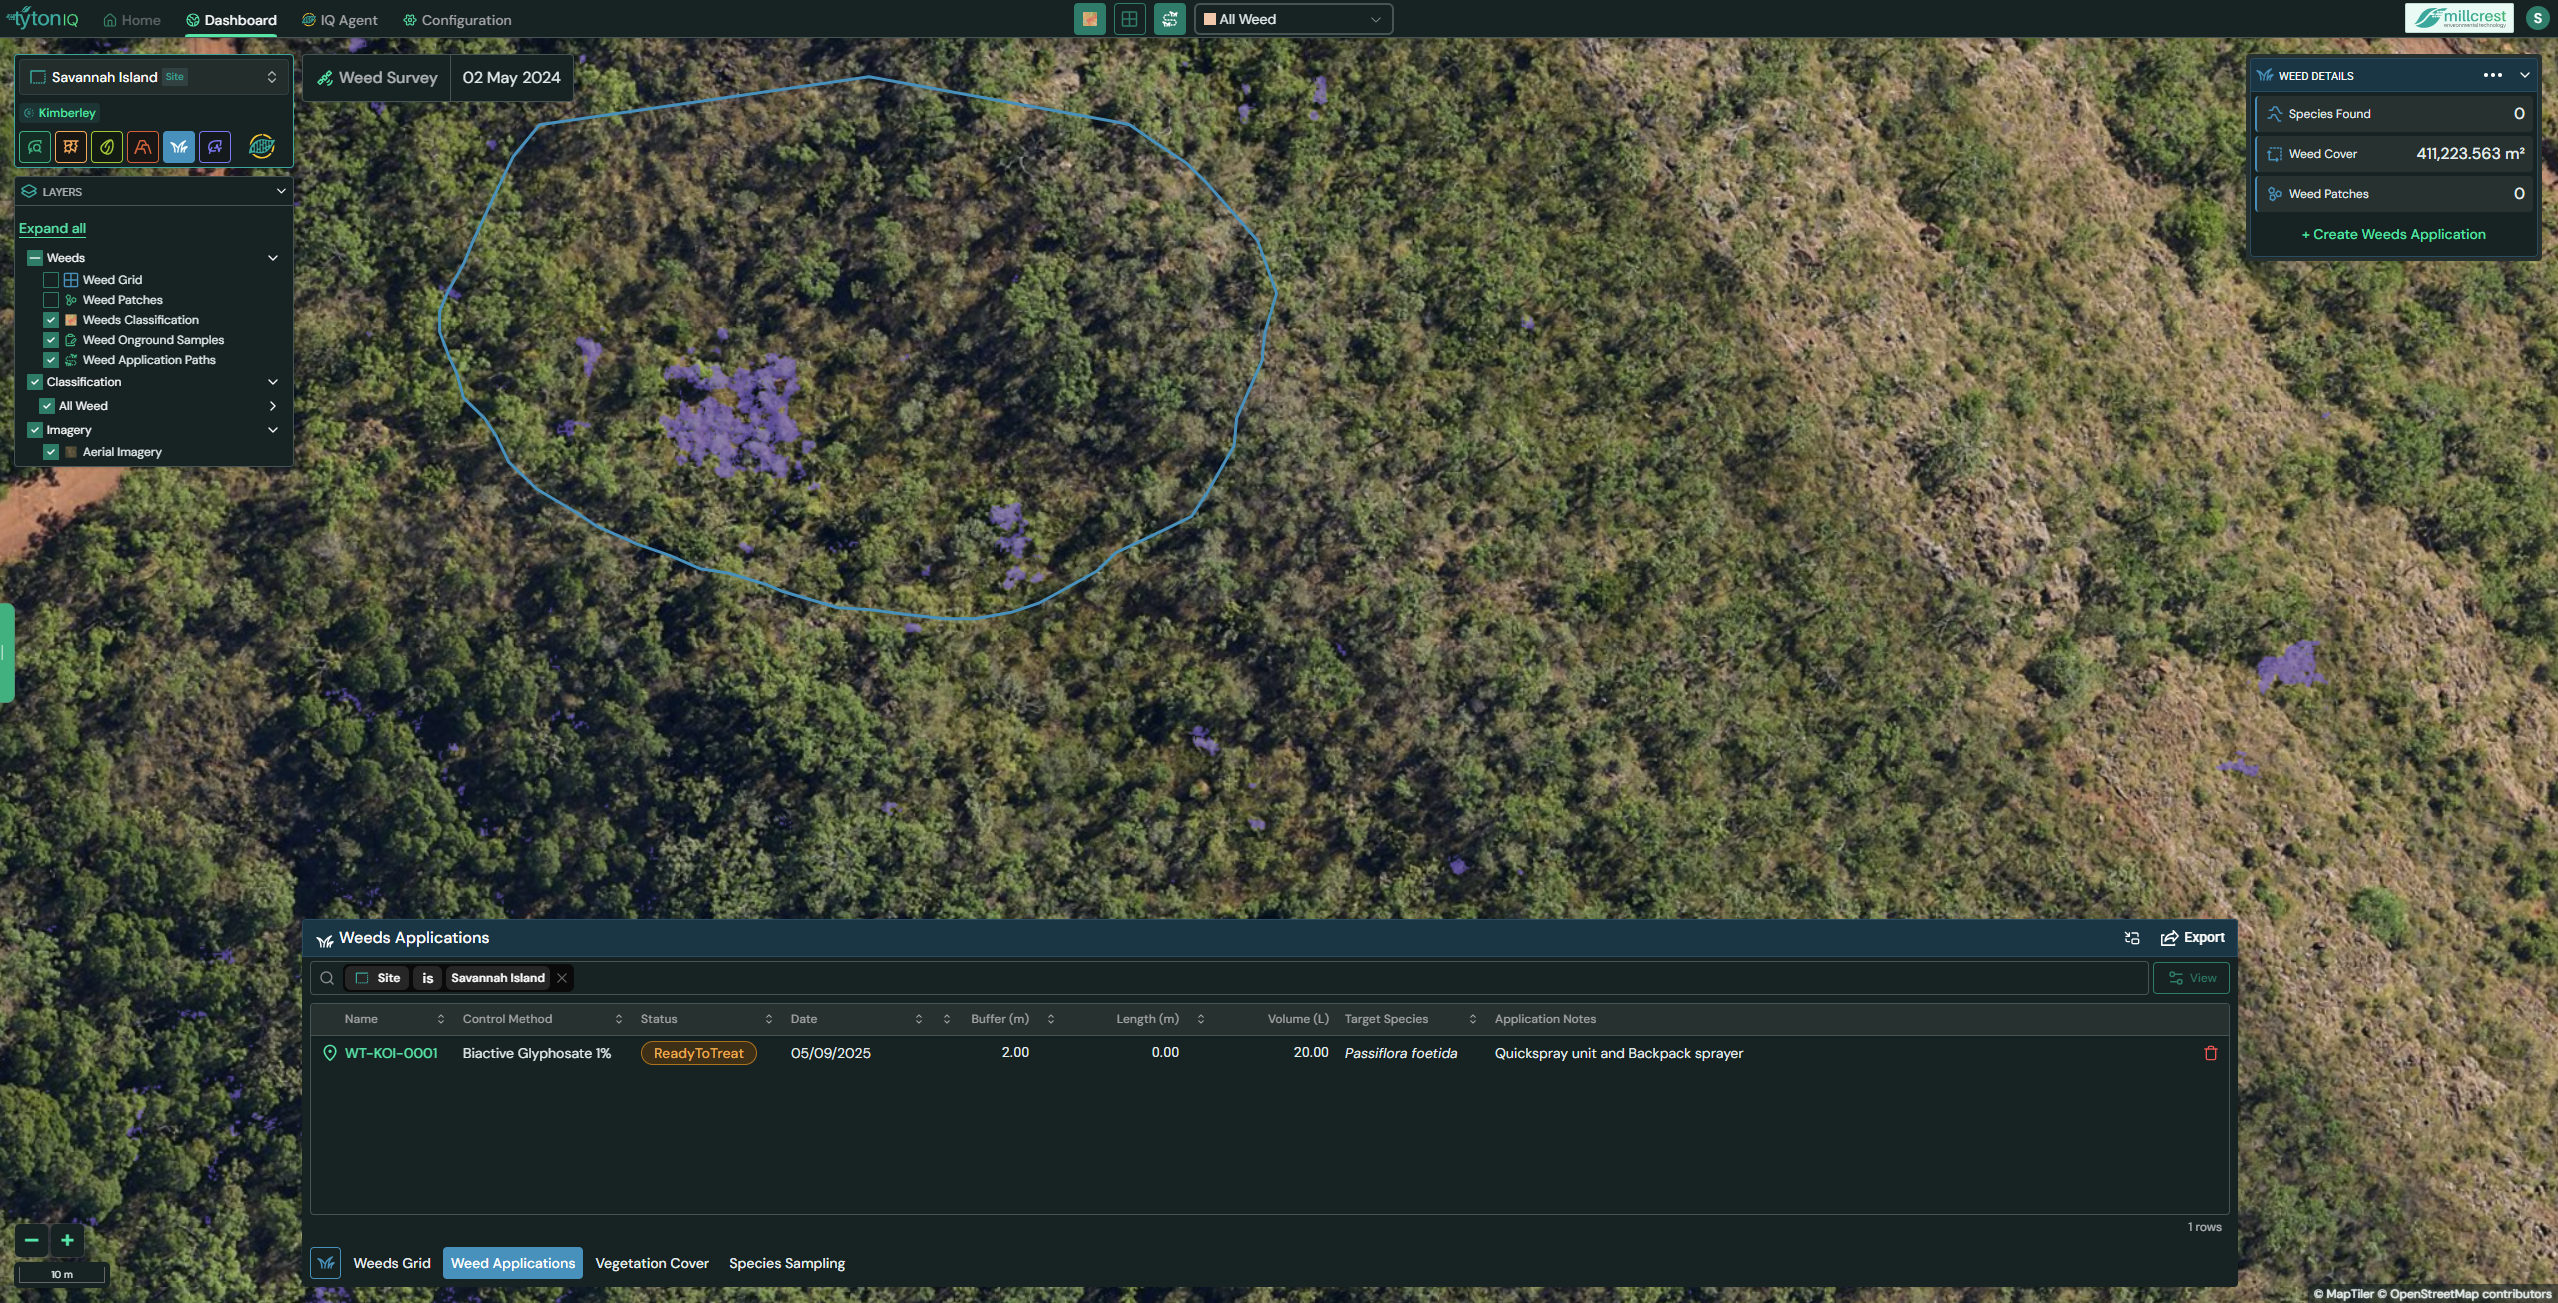
- On the map: The uploaded path renders as a blue polygon/line. You can show/hide it using Weed Application Paths in the toolbar or LAYERS panel.
- In the bottom drawer: The application appears in Weed Applications with key columns (as configured), e.g.:
- Name
- Control Method
- Status (e.g., ReadyToTreat)
- Date
- Buffer (m)
- Length (m)
- Volume (L)
- Target Species
- Application Notes
- Export (if enabled): Use the Export button in the drawer to download application records for reporting.
Tip
- If the Create Weed Application button is not available, ensure the Weeds Grid layer is off.
- Use a projected CRS in your shapefile appropriate for your site to ensure buffer, length and area values are meaningful.
- Keep Application Notes specific (equipment, operator/contractor, constraints) to support auditing and repeatability.